1.0 About this
The goal of this article is to be a base for a complete installarion of GOsa2, it will be used by future articles on what maters with integrating with others services.
2.0 What GOsa2 means?
GOsa2 is the constrict form for GOnicus System Administration.
From author’s site gosa-project.org
A mighty System-/Config-management frontend using LDAP as a backend. It is able to manage POSIX, Samba, Mail, Kolab, FAX, Asterisk and many more services.
3.0 Prerequisites
4.0 Instaling pre-requisites
As said before, I’m assuming that you already have an installation of CentOS or Red Hat, therefore, I’ll be covering the system requisites to get a functional GOsa2.
4.1 Installing the yum EPEL repository
4.2 Setting the repository for GOsa2
Go to
/etc/yum.repos.d and create the file
GOsa2.repo with your favorite text editor.
File:
/etc/yum.repos.d/GOsa2.repo4.3 Setting the repository for PHP 5.2
GOsa2 needs the PHP 5.2 to run, however, there’s no PHP 5.2 on official repository. With that said, we need to set up a third party repository.
For this article I’ll be using the repository from
Utter Ramblings. It’s a nice and reliable repo, you can use it with no fear.
Go to
/etc/yum.repos.d and with your favorite text editor create a file called
utterramblings.repo.
File:
/etc/yum.repos.d/utterramblings.repo2 | name=Jason's Utter Ramblings Repo |
This repo already have a version of Apache 2.2.x (2.2.14 at this momment) that we’ll be using.
4.4 Installing OpenLDAP Server
We’ll use the offical version (which means the one into the repository or Media).
To accomplish this, execute the following command:
1 | yum install openldap openldap-clients openldap-servers |
5.0 Installing GOsa2 via yum
With the prerequisites satisfied, continue the installation of GOsa2
There are a couple of plugins availiable from GOsa2 respository, doing a search over it, it is possible to get an idea of which of them you really need to install. Install those that suit to your environment.
WARNING: Avoid to install the package
gosa-desktop, as it will install Gnome and X.org as dependence.
Below are the packs that we will use in this article. Feel free to alter it.
1 | yum install gosa-schema.noarch gosa-plugin-systems.noarch gosa-plugin-sudo.noarch gosa-plugin-squid.noarch gosa-plugin-samba.noarch gosa-plugin-rolemanagement.noarch gosa-plugin-pureftpd.noarch gosa-plugin-mail.noarch gosa-plugin-log.noarch gosa-plugin-ldapmanager.noarch gosa-plugin-dns.noarch gosa-plugin-dhcp.noarch gosa-plugin-connectivity.noarch gosa-plugin-addressbook.noarch gosa-help-en.noarch gosa.noarch |
5.1 Edit PHP (php.ini) params to suit GOsa2
To GOsa2 run happy, it’s necessary to alter 2 parameters in file
/etc/php.ini. Edit it and save it.
Before:
- expose_php = On
- magic_quotes_gpc = Off
After:
- expose_php = Off
- magic_quotes_gpc = On
5.2 Making sure the services start at boot time
1 | chkconfig --levels 35 ldap on |
2 | chkconfig --levels 35 httpd on |
6.0 Setting OpenLDAP to suit GOsa2 needs
With all those work we have done so far, now it’s a critical time, but simple to do.
Will be necessary to suit OpenLDAP to talk to GOsa2, this means showing the right
schemas to OpenLDAP.
Make a backup copy from the original
slapd.conf file.
2 | cp slapd.conf slapd.conf.orig |
To generate the
cn=Manager password hash.
4 | {SSHA}Nag4FWwXLoGO/WpdpFJUlMVCBYwB94wt |
The result will be the hash from the entered password, this case I used “fogonacaixadagua”. Keep this hash, we will use it soon.
Now, make your
/etc/openldap/slapd.conf look like the one below:
File:
/etc/openldap/slapd.conf01 | include /etc/openldap/schema/corba.schema |
02 | include /etc/openldap/schema/core.schema |
03 | include /etc/openldap/schema/cosine.schema |
04 | include /etc/openldap/schema/dyngroup.schema |
05 | include /etc/openldap/schema/inetorgperson.schema |
06 | include /etc/openldap/schema/java.schema |
07 | include /etc/openldap/schema/misc.schema |
08 | include /etc/openldap/schema/nis.schema |
09 | include /etc/openldap/schema/openldap.schema |
10 | include /etc/openldap/schema/ppolicy.schema |
12 | include /etc/openldap/schema/gosa/samba3.schema |
13 | include /etc/openldap/schema/gosa/pureftpd.schema |
14 | include /etc/openldap/schema/gosa/gofon.schema |
15 | include /etc/openldap/schema/gosa/gosystem.schema |
16 | include /etc/openldap/schema/gosa/goto.schema |
17 | include /etc/openldap/schema/gosa/gosa-samba3.schema |
18 | include /etc/openldap/schema/gosa/gofax.schema |
19 | include /etc/openldap/schema/gosa/goserver.schema |
20 | include /etc/openldap/schema/gosa/goto-mime.schema |
21 | include /etc/openldap/schema/gosa/trust.schema |
22 | include /etc/openldap/schema/gosa/dnszone.schema |
23 | include /etc/openldap/schema/gosa/gosa_custom.schema |
25 | pidfile /var/run/openldap/slapd.pid |
26 | argsfile /var/run/openldap/slapd.args |
29 | suffix "dc=FogoNaCaixadAgua" |
30 | rootdn "cn=Manager,dc=FogoNaCaixadAgua" |
32 | # Senha gerada pelo comando slappasswd -h {SSHA} |
33 | rootpw {SSHA}Nag4FWwXLoGO/WpdpFJUlMVCBYwB94wt |
35 | directory /var/lib/ldap |
37 | index entryCSN,entryUUID eq |
39 | index gosaMailAlternateAddress,gosaMailForwardingAddress eq |
40 | index cn,sn,givenName,ou pres,eq,sub |
41 | index objectClass pres,eq |
42 | index uidNumber,gidNumber,memberuid eq |
43 | index gosaSubtreeACL,gosaObject,gosaUser pres,eq |
45 | index sambaPrimaryGroupSID eq |
46 | index sambaDomainName eq |
To copy some schemas that aren’t on schemas’ dir:
1 | cp /usr/share/gosa/plugins/pureftpd/contrib/pureftpd.schema /etc/openldap/schema/gosa |
2 | cp /usr/share/gosa/plugins/dns/contrib/dnszone.schema /etc/openldap/schema/gosa |
Create the file
/etc/openldap/schema/gosa_custom.schema with the following content:
File:
/etc/openldap/schema/gosa_custom.schema01 | #$Id: authldap.schema,v 1.8 2005/03/20 19:10:30 mrsam Exp $ |
03 | # OID prefix: 1.3.6.1.4.1.25981 |
05 | # Attributes: 1.3.6.1.4.1.25981.1.1 |
07 | # Depends on: gosa.schema and cosine.schema |
09 | attributetype ( 1.3.6.1.4.1.25981.1.1.1 NAME 'gosaMailHome' |
10 | DESC 'The absolute path to the mail message stor directory in a virtual mail setup.' |
11 | EQUALITY caseExactIA5Match |
12 | SYNTAX 1.3.6.1.4.1.1466.115.121.1.26 SINGLE-VALUE ) |
15 | # Objects: 1.3.6.1.4.1.25981.1.2 |
18 | objectclass ( 1.3.6.1.4.1.25981.1.2.1 NAME 'gosaVirtualMailAccount' SUP top AUXILIARY |
19 | DESC 'Objectclass to mark Virtual MailAccounts for GOsa (v2.4)' |
20 | MAY ( gosaMailHome ) ) |
7.0 Starting OpenLDP
With OpenLDAP server configured and the schemas on the right place, copy DB_CONFIG.example to LDAP’s dir:
2 | cp DB_CONFIG.example /var/lib/ldap/DB_CONFIG |
Now, you can start OpenLDAP and you can verify if it’s gonna ok.
2 | Checking configuration files for slapd: config file testing succeeded |
8.0 Starting Apache
Apache was installed with the GOsa2. The GOsa2 package created the config file to apache, this file can be found at
/etc/httpd/conf.d/gosa-apache.confFile:
/etc/httpd/conf.d/gosa-apache.conf01 | # Include GOsa to your web service |
02 | Alias /gosa /usr/share/gosa/html |
06 | php_admin_flag engine on |
07 | php_admin_flag register_globals off |
08 | php_admin_flag allow_call_time_pass_reference off |
09 | php_admin_flag expose_php off |
10 | php_admin_flag zend.ze1_compatibility_mode off |
11 | php_admin_flag register_long_arrays off |
12 | php_admin_flag magic_quotes_gpc on |
13 | php_admin_value upload_tmp_dir /var/spool/gosa/ |
14 | php_admin_value session.cookie_lifetime 0 |
15 | include /etc/gosa/gosa.secrets |
20 | PHP_Fix_Pathinfo_Enable 1 |
23 | AddHandler fcgid-script .php |
24 | FCGIWrapper /var/www/php-fcgi/php-fcgi-starter .php |
25 | include /etc/gosa/gosa.secrets |
Isnt’ recommended to edit it, do it only if it’s really necessary.
Time to start Apache:
9.0 Setting GOsa2 through Web interface
After starting Apache, access through of server IP.
9.1 Initial screen of GOsa2 set up
http://192.168.11.13/gosa/

Note the highlighted part on image, it’s necessary to execute the above command to GOsa2 installer know that you have control over server.
1 | echo -n 93esjraq6baopmpchl1qsksc84 > /tmp/gosa.auth |
After you executed the command, click “Next”.
9.2 Language selection

Pick up the correct one and Click “Next”.
9.3 Environment checking

If you got any error here, get back to: 5.1 Edit PHP (php.ini) params to suit GOsa2.
After all field being marked with Ok, click “Next”.
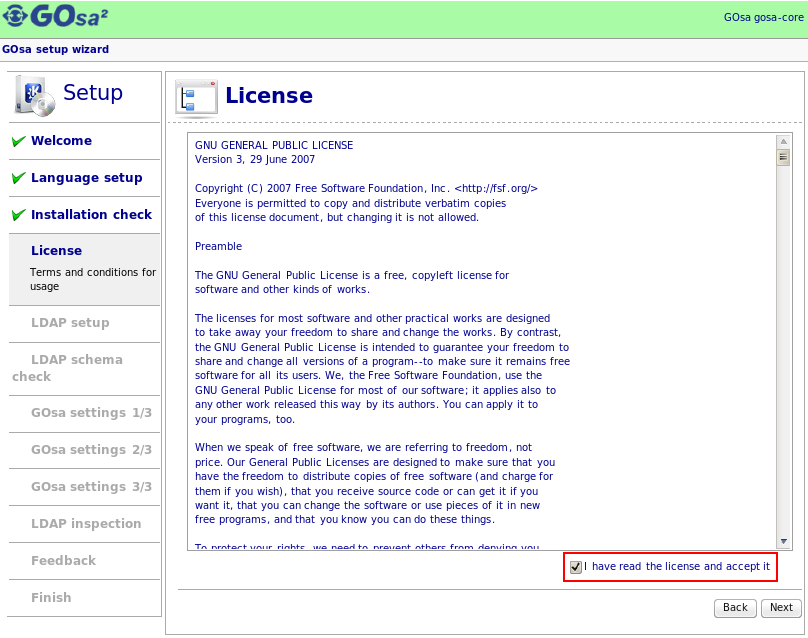
License agreement
This screen you must accept the license.
![]()
After you check it, click “Next.
9.4 LDAP Connection
Here you set the connection between GOsa2 and OpenLDAP that we configured before.

The parts tha need to be changed are marked in 1 and 2:
1. Put the conext to Manager user: “cn=Manager,dc=FogoNaCaixadAgua”
2. Password hash, “fogonacaixadagua”
Click “Next”".
9.5 Schema validation
Yeah!

Click “Next”.
9.6 Setting GOsa2 1/3
Let the default ones and click “Next”.

9.7 Setting GOsa2 2/3
Some settings to GOsa2.

Below I’ll explain the changes done, based on the number into above picture, change them as show.
1. the context that will have the Workstations info from Windows Domain.
2. Timezone for GOsa2.
3. Enable Copy & Paster, it’s a nice function, very interesting when you change some entry into an Organizational Unit, for example.
4. Enable snapshots, they are useful to revert some bat change, for example
5. Put the Manager password, “fogonacaixadagua”.
Click “Next” after you finish it.
9.8 Setting GOsa2 3/3
Last part on setting GOsa2.

1. Enter your SNMP community, if you have one in your network, otherwise put ‘public’.
2. To enable the SUDO config from GOsa2 Interface
Click “Next”.
9.9 Inspecting OpenLDAP
In this screen will have a full check to verify if you have some tree in LDAP, as we started from scratch, it have nothing, because of this you see a lot of “Fails”.
Do not worry, soon it will be all Green ;)
To create a root object, click the button as highlighted on pic below:

After clicking “Try to create a root object” look that the things are starting to getting better :D

First click the button “Migrate”, in “Inspecting object classes in root object” then you will be redirected to the following page:

Click “Migrate”.
Getting back to LDAP Inspection page, click the unique button shown.

This time it’s to create a password for the user ‘admin’ that will log into GOsa2 interface. Enter a password, here is “fogonacaixadagua” then click “Apply”

All nice and green, as I promised you.

Time to go to the last part. Click “Next”.
9.10 Send a feedback
You are on your own.
Finnished, click “Next”.
9.11 Almost END

Download the config file to your computer and then copy it to
/etc/gosa on server side, apply the permissions as shown by installer.
1 | scp ~/temp/gosa.conf root@192.168.11.13:/etc/gosa |
After, on GOsa2 server
1 | chown root:apache /etc/gosa/gosa.conf |
2 | chmod 640 /etc/gosa/gosa.conf |
Click “Next” on final step to confirm that the config file is there.
You will be awarded with the login screen, use the ‘admin’ user and the password defined in the install process to login.


No comments:
Post a Comment